If You're Reading This It's Too Late - Upgrading The Blog
Self-hosting. With more freedom comes more responsibility. Self hosting this blog has been super rewarding but full of headaches. If traffic gets too high (though rare) - the site falls down. The emails I send out often end up in followers' spam mailboxes. There’s also a lot that goes into each post besides writing. Getting links, taking pictures, editing, and one that’s not rewarding: resizing images. I’m gonna share how I debugged all these issues in a night. Here’s what I learned!
Preventing The Site From Falling Over
I host this blog on Digital Ocean. It’s a super super tiny instance with a small amount of RAM (1GB). With a few people on the site, it doesn’t take much for the RAM to fill up and the site to become useless. One fix is adding Cloudflare or another CDN to help reduce the number of requests that hit the server.
How it works: Cloudflare has a network of servers all over the country. You point your domain name to their servers instead of yours. When a request comes in, it checks if it has a saved response. If it's there is returns it. If there's nothing, the request is forwarded to your server. Your server's response is returned and saved on their servers for future requests. You get less load on your servers, quicker load times, extra security from DDoS attacks, and oh yeah - it’s free. (I love their product and own some stock in the company).
This was pretty straightforward and I implemented it in a handful of minutes. I used this as a rough guide but it’s not even needed. Here’s what you do:
- Sign up for Cloudflare
- Type in your domain name
- Select free
- It’ll copy your DNS record, hit continue

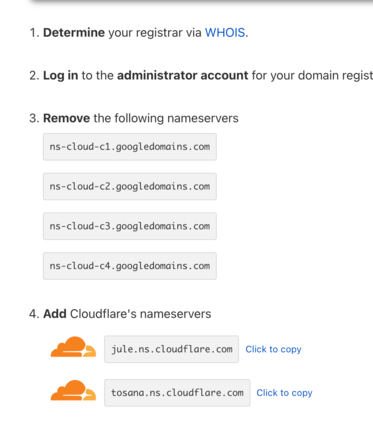
- Time to overwrite the name server. Your name server is where your DNS records live. In my case, I’m going from Google Domains to Cloudflare. Google’s UI and overall ease of use make them my go-to for buying/managing domains (even though some sites are a tiny bit cheaper).
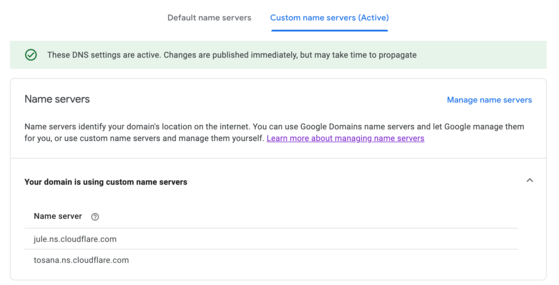
- Hit complete and you’ll get an email shortly after saying that you’re all set up!
Great so everything is all set up with the CDN, but I still want to make my site more resilient. Like I said with such a small amount of RAM the site is vulnerable to crashing. I Googled around and it made sense to partition some of my hard drive for swap space.
Swap space gives your computer extra space if your RAM gets full. Storing data in swap space over your RAM is slower but it’s better than the site not responding! The general size is 1-2x the size of your RAM. I’m not gonna dive too much deeper but the guide and info are here. It’s more straightforward than one would expect.
Poor Email Delivery
At the moment, email is arguably the most effective way of reaching members/customers. The thing is my emails were all screened or put in spam. I had a big issue. This meant new members couldn’t confirm subscriptions. Plus current members weren't updated on new posts. No bueno. How does one even debug this? My provider MailGun didn’t have any answers. Luckily the rest of the internet did. While working on another project, I came across MailTester.
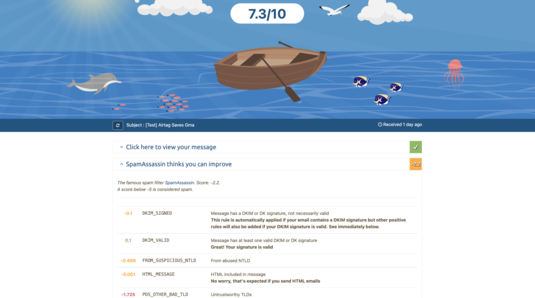
You email the test address MailTester gives you (I used a test post) and it will analyze how spammy your email is. As you can see above, it also gives you suggestions.
My biggest issue: I never set up an MX (mail exchange) record. This record tells a mail service where to route incoming emails. Not having this is a huge red flag for email providers. Emails marked below 5/10 are treated as spam and mine was at 4.2/10. Updating the MX record alone took me to a 7.3/10 which was good enough for now!
Editing Images
With few exceptions I want most images in my posts to be about the same size. Usually, this consists of going through one by one and adjusting the image sizes. It’s a royal pain.
Let’s make it easy. I Googled around and found a library called Imagemagick. With a little trial and error and a little StackOverflow, I found a solution. I can set all images to around the same size with one bash command.
magick mogrify -resize 120000@ -quality 100 -path ../new_imgs/ *
Let’s do a quick breakdown. You run the resize command in the directory you want and it runs on all files.
- 120000@ - we set the pixel area we want for our images. So in this case all images will be roughly 12,000 (~400x300) pixels. This is great for images regardless of whether they’re long or wide.
- quality 100 - keep the quality the same
- -path ../new_imgs/ * - where to put the new images. Our original image is kept safe if we want to do something else with it.
This library is super powerful and I’ll likely use it for more projects. There are so many features to learn.
Images you see on this post are all formated using this solution!
Conclusion
These were my main changes from this session of updating the blog! I did a few more tweaks:
- Making sure comments were showing on the right page
- Updating some visuals
- Making tiny tweaks for page speed
Self-hosting has a lot more overhead but I love having “root access”. Creating and maintaining this has been such a great learning experience!